VCP7-CMA – Objective 1.1
Disclaimer: These are my notes from taking the 2V0-731 exam. If something doesn’t make sense, please feel free to reach out.
The goal behind this objective is to be familiar with Blueprint creation.
Objective 1.1 – Create, Modify and Publish Blueprints Based on a Given Design
- Select the provisioning workflow, virtual machine template, and customization specification
- Configure expiration and archive durations
- Configure machine prefixes
- Configure and manage networking components
- Specify compute, memory, and storage resources
- Configure custom properties and property groups
- Create nested blueprints
- Create and add software components
- Publish blueprints
References
Permissions – A role with ‘architect’ in the title
Design – Blueprints, New.

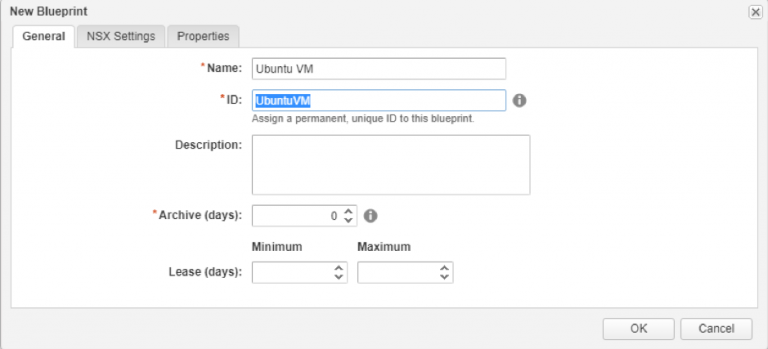
Give the blueprint a name and ID. Configure the lease duration – this is the time that the blueprint will be provisioned for before the archive period takes effect. If you choose different values for minimum and maximum then when requesting the blueprint it can be selected.
Lease: Duration the machine will be powered on and available
Archive: Duration the machine will be retained (powered off) once the lease period expires
NSX Settings are to define the transport zone and routing reservation policy. Properties is to define custom properties for the blueprint.
All the above can be edited after creation by clicking on the cog icon next to the blueprint name.

Once created, choose the relevant component to drag the machine onto the design canvas. You can click on each item on the canvas to configure the appropriate settings.
On the machine itself you give the item a name, choose the reservation policy, machine prefix & number of VMs to provision. The machine prefix can be chosen as a specific item from a list or it can be set to the business group default.
Under Build information there’s a number of provisioning workflows depending on the action selected. The actions are:
- Create
- BasicVMWorkflow
- ExternalProvisioningWorkflow
- ImportOvfWorkflow
- LinuxKickstartWorkflow
- VirtualSccmProvisioningWorkflow
- WIMImageWorkflow
- Clone
- CloneWorkflow
- LinkedClone
- CloneWorkflow
- NetApp FlexClone
- CloneWorkflow
When using Cloneworkflow – click on the ellipsis button to select the template to clone from & enter the customisation specification (NB: This is case sensitive)
Next is to configure the machine resources. These are the minimum and maximums that a user can select when requesting the blueprint.
Can add additional storage on the storage tab, configure the network on the network tab & add custom properties on the properties tab.
When Blueprints are saved they are in a draft state until they are published.
You can nest Blueprints to build up an application composed of other Blueprints. There are some behaviours that you should be familiar with when nesting. The high level is listed below, refer to the documentation link under references for more detail.
- Settings defined in the outer Blueprint take precedence over settings in nested Blueprints
- I couldn’t find any hard limits on how many levels of nesting you can use, however the recommendation is to keep to 3 levels to minimise complexity. This makes sense to me – Outer Blueprint, Machine Blueprint, Application Components
- If a user is entitled to a Blueprint, they’re entitled to all the nested Blueprints contained within